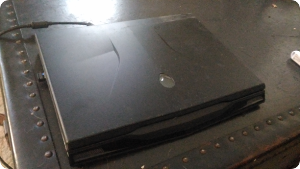
One of my kids uses an older Alienware M11x R2 hand-me-down (running Linux) but its hard drive up and died. I had a spare SSD and went to install that and discovered the laptop had developed the same exact hinge problem I recently saw in a much newer high end ASUS (sometimes copying another manufacturer's design doesn't end well).

Dell was apparently aware of the problem in 2011 since it purportedly issued a notice about it at that time according to PC World (good luck finding anything linked to on a blog post from 6 years ago) promising to fix the faulty hinges despite warranty status. In this throw-away economy its hard to justify taking the time to contact Dell, argue about it with someone, send it back and forth (on my dime), and wait for Dell to actually fix it if they even would (doubtful). A DIY solution was called for.

I found this video by Speed808 on YouTube which suggested it was possible to fix the hinges with epoxy. Definitely go watch that if you're considering a DIY solution like this. Opening up the M11x wasn't as difficult as I feared it would be. The screen protector wasn't glued on and just popped off with just a thin shim tool, and the flashing piece across the top of the keyboard (with the alien logo) was also in with just little plastic tabs and so easily removed. Removing these gave access to the hinges without having to dissassemble the whole laptop. I could see that the two hinges (which are metal) are supposed to connect to the plastic case for the screen via three screws each into obviously inadequate plastic receptacles. All 6 of these had broken and the screen was only remaining connected to the laptop because of the plastic trim pieces and wiring. I'm not sure how I would have proceeded if only a couple were broken as it might have made it more difficult to apply the epoxy - perhaps they can be unscrewed I don't know. Thankfully none of the wiring was damaged.
Discussing it with someone in engineering at work turned out to be a good idea. Since I work in a manufacturing facility the real-world efficacy of various epoxies had already been tested and proven for various materials and the epoxy I thought would be good to use turned out to be a poor choice. I was steered instead to a "Gray" epoxy which binds to plastic and metal quite well.

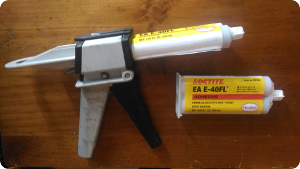
The method of application is via an epoxy "gun" which accepts 50ml cartridges. You need the gun, a nozzle, and a cartridge and the nozzle seems to depend on the cartridge you use. I used the dregs of a cartridge borrowed from work along with the gun after I realized that neither was going to be cheap. I'm not sure this fix would have been worth it otherwise. I used a Loctite 98472 manual dispensing gun for 50 ml cartridges which we get from from Jensen Tools but is also on Amazon (about $50) with a Henkel brand Locktite EA E-40FL adhesive which we call "gray epoxy" is also available on Amazon by Hysol (about $30). The cartridge has a cap to keep the epoxy from drying out if you don't use the whole thing. You remove the cap, attach the nozzle (the one I used required a Luer tip type) and ratchet the gun which pushes the separate components from the two individual tubes in the cartridge into the nozzle where they are mixed as they travel down the nozzle. When you're done you remove the nozzle and throw it away and replace the cap to preserve the rest of your expensive epoxy.

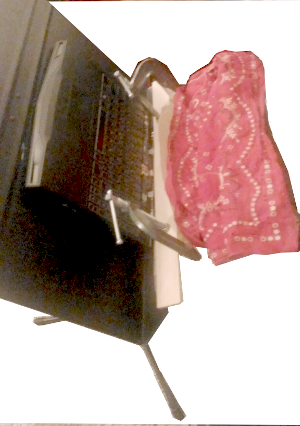
The problems of getting access to the hinges and choosing the correct epoxy solved, I knew the last hurdle was building some kind of jig that would allow the epoxy to cure. The instructions say it cures in 4 hours at 75 degrees F but I let it set up overnight or about 12 hours at about 60 degrees F. I decided on the following rather kludgey contraption. I set the laptop leaning backwards on a metal music stand (a decent Manhasset music stand) with the screen hanging off the short lip of the stand so the weight of the laptop would push down against the screen while the epoxy cured. I used a thin piece of wood to lift the base of the laptop a few cms while I applied the epoxy (the wiring kept them pretty close together).
I covered the exposed screen with a cotton cloth and applied the epoxy along the section of the screen trim where the metal hinge would attach. Then I removed the wood so the laptop pressed the hinges into it from above with the weight of the laptop. To keep them pressed firmly together for many hours I first folded some rice paper from the kitchen and laid that under a thin board figuring that if the epoxy bound to the paper I could rip it off later but if it bound to the wood it might break something when I tried to get it off, then I used two C clamps to hold the piece of wood in place during the cure process.

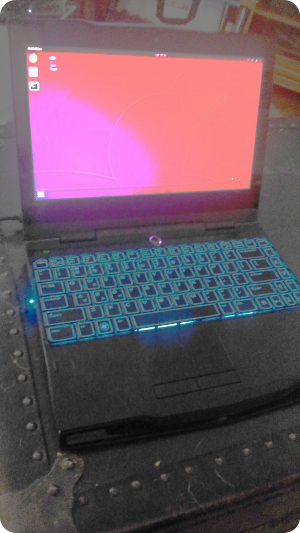
After the epoxy set up the laptop screen raises and lowers and seems pretty solid. The laptop fired up and is noticeably faster with a new SSD drive. As a gaming laptop it was pretty high end when new so even today its specs (an early i7, nvidia card, etc) are better than some so hopefully we'll get another couple years of service out of her.


